Monday, November 21, 2011

Sleeping Beauties- Planting Spring Bulbs


It’s that time of year again- late fall with ***BRRR*** winter just around the corner. There seems no end to the long list of gardening and yard work chores, but on of the most fruitful (albeit a delayed gratification) is planting spring bulbs.
RETAIL THERAPY
Fall bulbs are found for sale almost everywhere, including grocery and hardware outlets.  Wider selections and fancier varieties can be found at plant nurseries, specialty gardening shops and online from companies like Vesey’s.
 If you plan to “grow for show” (exhibition, completion), purchase only named varieties “Black Beauty” tulip, “White Lion” narcissus etc.  All other points being equal, a flower identified by name in competition will win.

In all cases and regardless of bulb type or variety, chose only well formed, dry but un-shrivelled bulbs as close to blemish- free as possible. Blemished or damp bulbs are likely to rot in the ground.
While you are shopping, don’t forget to stock up on blood meal or a blood-bone meal mixture for bulb fertilizer. This will not only nourish your bulbs as they grow over the winner but will help to deter squirrels and chipmunks who like nothing more than to dig up bulbs for a fall picnic.
Unless you are planting into previously unplanted ground, or can otherwise plant into holes dug by a shovel, you may also wish to consider purchasing a speciality bulb planting tool that goes by a number of peculiar names- dibber, dibble or dibbler. If you are planting bulbs singly (perhaps between perenials or tree roots) TRUST me, a dibbler will really help save your wrist. As a bonus, most are notched or labelled with planting depths- particular important to pay attention to when planting bulbs.
GENERAL PLANTING TIPS
-Plant in groups rather than rows.  
-Odd number grouping are always more impactful (general design rule)
-Stagger taller bulbs and other plants to the back of the bed, with shorter ones near to the edge.
- Plant bulbs POINTY SIDE UP (you’d be surprised how many folks don’t know this).
-General bulb planting depth is 2 ½ times the bulb height.  But ALWAYS check the package insert for specific directions.
-You need to grow it to know it, so choose some bulbs that strike your fancy and get planting.
When you see those sleeping beauties poking through the snow and mud, and later enjoy their beautiful color and fragrance, you’ll be glad you did!

Sunday, March 27, 2011

Nectar of the Gods- It's Maple Syrup Time

It’s chilly March- snow still covers the ground and ice still covers the lake. I’m tired of winter now and looking for signs of spring.
The very first one every year is the phone call from my neighbour asking for permission to tap my maple trees- hurray!
our tapped maples
Maples and other sap-producing trees store starch in their stems and roots before the winter; the starch is then converted to sugar and rises in the sap in the spring.
The trees can be tapped and the exuded sap concentrated by boiling to evaporate the water.
My neighbor likes my trees because of the high sugar content in the sap – over 3 percent. Two to five percent is necessary for syrup. The sap itself in natural form is a nutrtious drink- high in glucose, antioxidants and vitamins. In South Korea in particular it is traditional to consume maple sap, which they call "gorosoe", instead of processing it into syrup.

Gorosoe, anyone?
Maples are usually tapped beginning between 30 and 40 years of age. According to Wikipedia, each tree can support between one and three taps, depending on its trunk diameter. The average maple tree will produce between 35 to 50 litres (9.2 to 13 US gal) of sap per season, up to 12 litres (3.2 US gal) per day. This is roughly equal to 7 percent of a tree’s total available sap. During the day, the above- zero temperatures allows the starch stored in the roots for the winter to rise through the trunk as sugary sap, and to flow out of the tap into the sap bucket (or tap line).

Sugar Shack
When my neighbor readies for “a syrup run”, he has to be committed , because the process from start to finish takes 12-15 hours. He first empties our sap buckets into a large plastic barrel on the side of his sugar shack. He built this small modular sugar shack himself - he puts it up and dismantles it each spring. He bought the evaporator in Vermont- the world’s #1 maple syrup-producing area. Lanark County (where I reside) bills itself as the maple syrup-producing capital of Ontario, and with the abundance of maple trees and sugarshacks in the area, it’s not hard to see why.
Sap Evaporator


The harvested sap drips down into the left side of the evaporator where it is super-heated over a woodfire. The water steadily evaporates and as the sap travels mysteriously from the left to the right side of the evaporator, it starts to turn to syrup. My neighbor continously skims off any debris or “sugar foam” on the top.
When it reaches 7 degrees above the water boiling point, its at the right stage. My neighbor removes it and “finishes” it on his gas kitchen stove, where he has more control over the temperature. He then pours the syrup into sterilized mason jars, and our very own “Nectar Of The Gods” is captured in glass, just waiting for a golden (pancake or french toast) opportunity.

Wednesday, February 16, 2011

It’s All Greek to Me- A Visit to the National Gardens, Athens

Whenever I travel near or abroad I inevitably find myself drawn to the gardens or green spaces in the places I visit. Athens, Greece two years ago was no exception.
When researching our trip I wanted to explore the many facets of the Greek capital, home to 3 million people.

Those of you uninitiated to the “charms” of Athens will know just how dirty, loud, traffic- congested and uninspired it is. Unlike many large urban centres and particularly national capitals, Athens is lacking in green space, urban beautification and architectural interest (except for the prolific ancient ruins, of course!).
Tucked away adjacent the Greek Parliament (where you can see the colourful and entertaining changing of the Evzones national guard hourly) lies a hidden Hellenic gem, the National Gardens.

Changing of the Evzones Guard

Formerly called the Royal Gardens and established by Queen Amalia in 1838, the 15.5 hectare landscape provides a restful and verdant pause from the chaos of Athens and hectic pace of many tourist itineraries. The entrance fee is nominal and it’s a great place t take kids as there is a duck pond, a small zoo and a playground. There is also an abundance of beautiful statuary and some ancient monuments scattered throughout.

Beautiful rose arbour
Who doesn't love palm trees?

Don’t hope for the informative signboards and horticultural specimen tags that most botanical and national gardens possess. Just as when visiting the ancient Hellenic sites and monuments across Greece, you must either employ the services of a knowledgeable guide or avail yourself of a guidebook for sale at the entrance. Or just enjoy the beauty and the moment.

A gorgeous pergola complete with statutary and waterfall

The Greek gardening style is definitely less formal than French or Italian!!


Duck pond and bridge - ducks were occupied by a group of exeuberant, bread-toting preschoolers nearby
An abundance of benches and chairs are thoughtfully placed throughout the gardens, enabling a welcome break for hot, weary travellers. Washroom and refreshment facilities however, are few and directional signage is poor. This is typical Greek tragedyJ.


So if you ever find yourself in downtown Athens on a hot day- grab an ice cold Mythos beer and a hot gyro from a street vendor, and head to the National Gardens for some green rejuvenation. It just may inspire a walk up to the Acropolis...

Friday, February 11, 2011

Hip To Be Square- intro to Square Foot Gardening

While my garden sleeps under a thick blanket of snow, I too am dreaming.
Dreaming of the many varieties of flowers and foliage will be able to enjoy for the first time, but most importantly, a REAL veggie patch!

I live on a beautiful lakeside ¾ acre property, blessed with no less than 22 mature maples, two 60 foot hemlocks and a half dozen ash, cedar etc.
This dense canopy makes for an uncommonly lush and shady oasis, but negates the possibility of a verdant vegetable garden. I’ve been constrained to leaf lettuce, radishes, certain herbs, and a few struggling bush beans. Tomatoes, peppers and other sun lovers placed in pots in my sunniest spots required hours of TLC just to subsist. I gave up on them after 2 frustrating seasons.

This fall I invested in the services of a professional arborist team, who trimmed and tamed the overgrown forest. Beyond reducing the extent of leaf damage to my roof (and to my back- I spend about 30 hours a year raking millions of maple leaves), this will radically change my garden- what I can grow and where I can grow it.

Men In Trees- Eastern Ontario Tree Care takin' care of business


Now my garden will finally see the light! Looking to maximize the small space I’m willing to allot from flowers to veggies, applying the concept of square foot gardening become obvious.
Square foot gardening is a collection of bio-intensive methods for producing for highest yield with lowest effort.
Click here to see My main reference

MAIN PRINCIPLES:

1. Layout

Raised beds- for easiest accessibility from all sides

Size- constructed in 4’x4’ foot square beds, again so you can reach any part of the bed from any angle. Also discourages over planting. You can plant as many of the 4x4 squares as you wish, depending on how much space you have any how much you want to grow

Layout- the 4X4 squares are further broken down into 1' square blocks. You plant by block, utilising as many blocks as you need for each plant specimen at maturity (indicated on the seed packet as plant spacing. For example, a mature zucchini plant may take up 8 blocks, a mature cabbage would take up 1 block, or beets could be planted 4 to a block.

This method forces frugality in seed planting usage (no more planting hundreds of seeds in endless rows), and negates the need for thinning (wasteful and time consuming!). It also encourages under planting later harvest species (i.e. pumpkins) with smaller earlier species like leaf lettuce or radishes- provided you adhere to the seed to space ratio at all times.

This layout naturally promotes cross-pollination, companion planting, pest deterrence and crop rotation techniques. For instance, one block of onions or garlic (natural pest deterrent) will be within extreme relative proximity to all other species planted in the bed, or adjacent beds, as opposed to large row planting.

Sample square foot garden plan
2. Soil Quality and Care

All gardeners know soil quality is perhaps the most important foundational element to a productive garden. This concept is taken to the extreme with square foot gardening.
Heavy emphasis is place d upon soil preparation, bedding mix, compost usage and planting seeds with a vermiculite mixture.

The soil is never stepped on so as to preserve its airy loamy texture.
The need to weed is drastically reduced by the dense planting and small space allotment overall. All weeding can be quickly done by hand- your tiller, hoe and cultivator can be recycled as garden art.
When harvesting, removed plants are replaced with a handful of dense compost per block.
Proponents say that since you are only caring for your garden by block, the work overall is reduced, and it mentally seems less of an insurmountable chore to plant, weed, water and harvest. You only have to care for as many blocks as need care at the time (or you have energy for), rather than a massive rowed garden that can quickly get ahead of you.
                                                  
I plan to utilise small straw bales (2x2x4) as my raised bed containment system, which I will place in an unused art of my driveway.
If my square foot gardening experiment is a bomb on too many levels, I will amend my perennial beds with the soil in the fall and utilise the straw as winter mulch.

So after a long snowshoe trek, fuelled with Bailey’s-laced coffee; I’ll spend part of this cold and snowy weekend with graph paper and a calculator, plotting my allotments and seed requirements.
And dreaming of spring.

If you have applied square foot gardening principles I would love to hear about your experience...

Wednesday, February 9, 2011

Fascinators workshop 2011-02-08

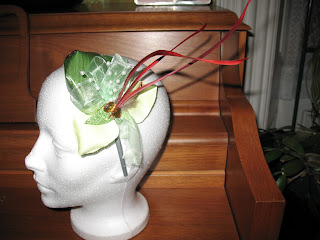
My friend Heather and I got together to make fascinators last night. We had fun and were proud of our creations. It took us about 2 hours to do 4 fascinators (2 head band, 2 combs).
We abandoned using clips and barrettes as you need a sizable base to affix the adornments.

SUPPLIES LIST: hot glue gun and glue sticks, plastic head bands, plastic combs, feathers, faux flowers, ribbon, gauze, faux gems, faux pearl sprays, tea and cookies (for the crafters).


 FASCINATOR EXAMPLE HOW TO:
STEP 1: Hot glue feather set directly to base of hair comb. Use plenty of glue at all times, as the finished product can be heavy and you will need the support.

Step 2: Hot glue rose leaves on top of feather set base.


Step 3: Hot glue large faux rose to the comb.


The finished product! I would totally wear this with any of my many black ensembles.
Some snaps of the other fascinators we made:
I call this one "The Rooster"

Heather's beautiful creation on a head band


Another gorgeous comb designed by Heather
I know my 5 year old daughter will enjoy playing dress up with these beauties and my colleagues will be admiring the red rose one which I plan to wear to our next management meeting!
Please contact me if you are interested in more information on how to make fascinators, or would like to purchase one of the creations featured in this article. I can also make a bespoke fascinator specially for your next special occasion or outfit. Be fascinating!

Monday, February 7, 2011

Fascinating Fascinators


A fascinator is a headpiece or style of millinery. Modern fascinators are commonly made with combinations of flowers, feathers, beads, lace and ribbon. They attach to the hair by a comb, clip or headband.
They are gorgeous for weddings and other formal occasions, but are gaining popularity as another piece of everyday adornment. Very ornate fascinators are often seen at traditional horse racing events such as royal Ascot and the Melbourne Cup, royal/celebrity weddings, movie premieres and award shows.


Fascinators can be expensive to buy from established millinery or bridal designers, but simpler designs are becoming available at jewelry and assessory shops, and they are also quite easy and cost-effective to make at home. A few simple supplies, a hot glue gun and wire are all you need. Instructions and inspiration abound on the internet.
I will be trying my hand at making at least one this week, in anticipation of our Horticulture Society's spring flower show, which will feature fascinators. I will be giving an intro to fascinators to the Society and modelling my own creation, to generate interest in the craft and the upcoming show.

Stay tuned to see how fascinating my creation turns out. In the meantime, have some fun and wear a fascinator- you never know who may become fascinated with YOU!